
Vinyl Fence Notcher – How to Notch Vinyl Fence Rails Cleanly & Fast
Big Mama Vinyl Fence Notcher | Pro Tool for Routed Vinyl Fence Systems
Vinyl fence installation depends on precision. Routed-post systems require properly formed locking tabs to secure rails without screws—and the fastest, cleanest way to do that is with a dedicated vinyl fence notcher.
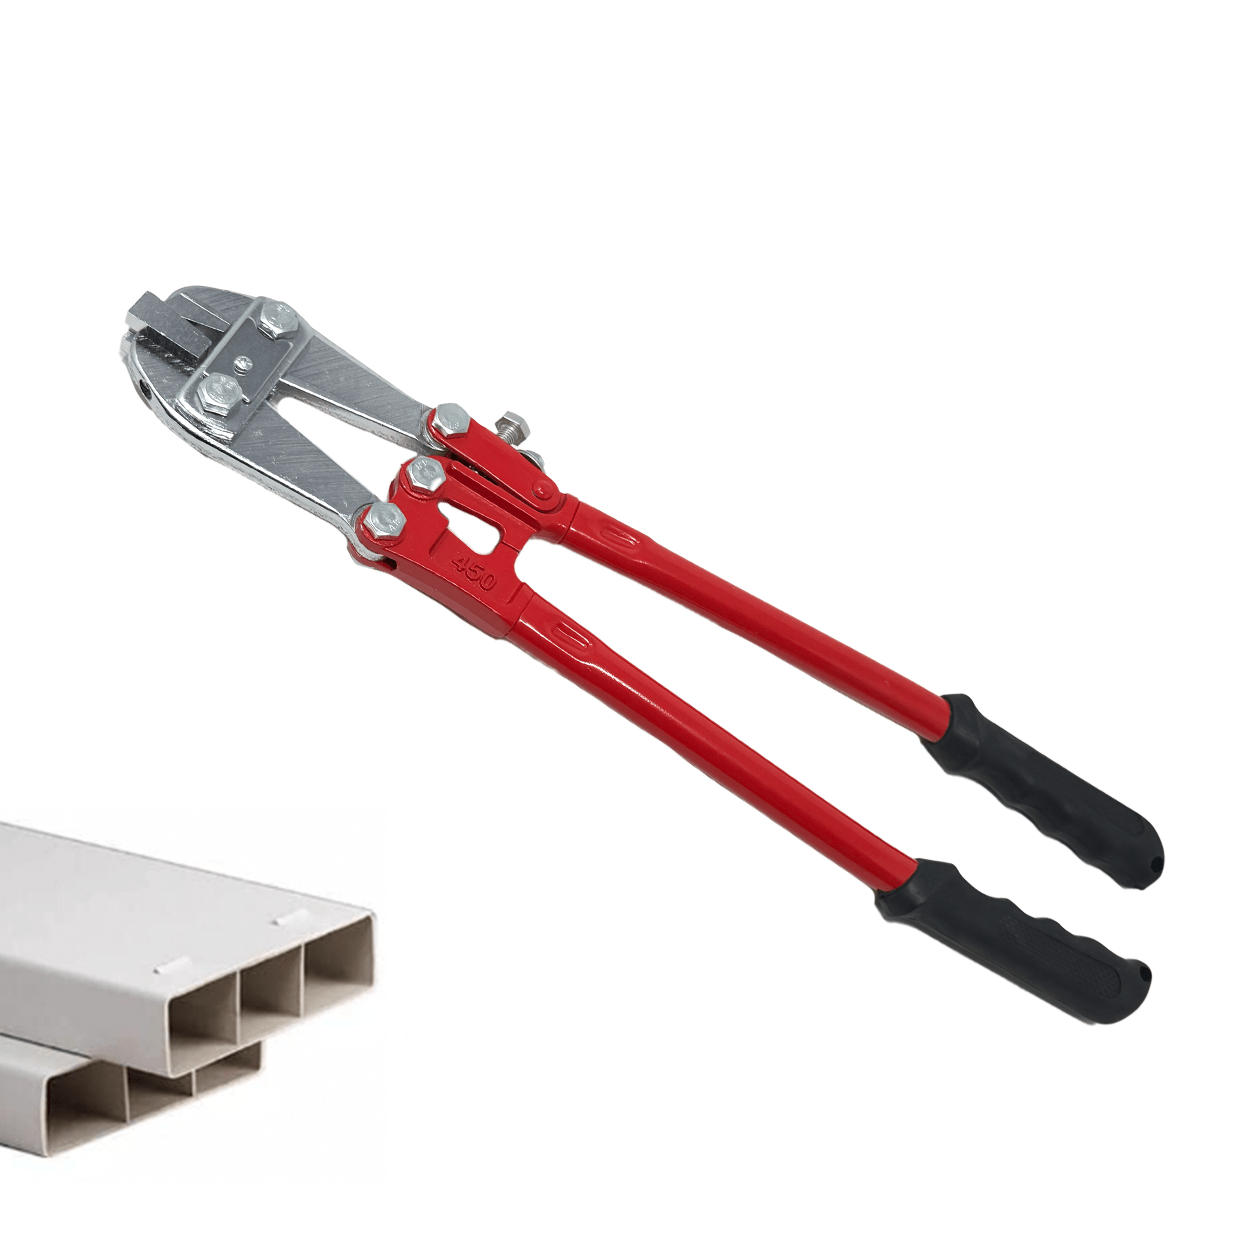
The Big Mama Vinyl Fence Notcher from ToolGuy is a heavy-duty, jobsite-ready tool designed to punch clean locking tabs into standard vinyl fence rails. It eliminates cracked rails, sloppy cuts, and wasted time—making it a must-have for fencing contractors and serious DIY installers.
Why Use a Vinyl Fence Notcher?
A vinyl fence notcher (also called a PVC rail notcher or vinyl rail crimper) creates a precise tab at the end of a vinyl fence rail. That tab snaps into the routed slot inside the post, locking the rail securely while allowing natural expansion and contraction.
Using a proper notcher means:
- No exposed screws
- Faster installs
- Consistent rail engagement
- Reduced cracking and scrap
- Professional, factory-style results
Improvised methods—saws, knives, drills—often damage rails and slow production. A notcher is the correct tool for the job.
Big Mama Vinyl Fence Notcher – Key Specs
Built for real fence work, not light-duty use
- Rail compatibility: Standard 3/4″ vinyl fence rails
- Operation: Compound-action hand tool
- Construction: Heavy-duty steel
- Output: Clean locking tabs for routed posts
- Use cases: Residential & commercial vinyl fencing
This tool delivers bolt-cutter-style leverage to punch tabs cleanly and consistently—rail after rail.
How to Notch Vinyl Fence Rails (Step-by-Step)
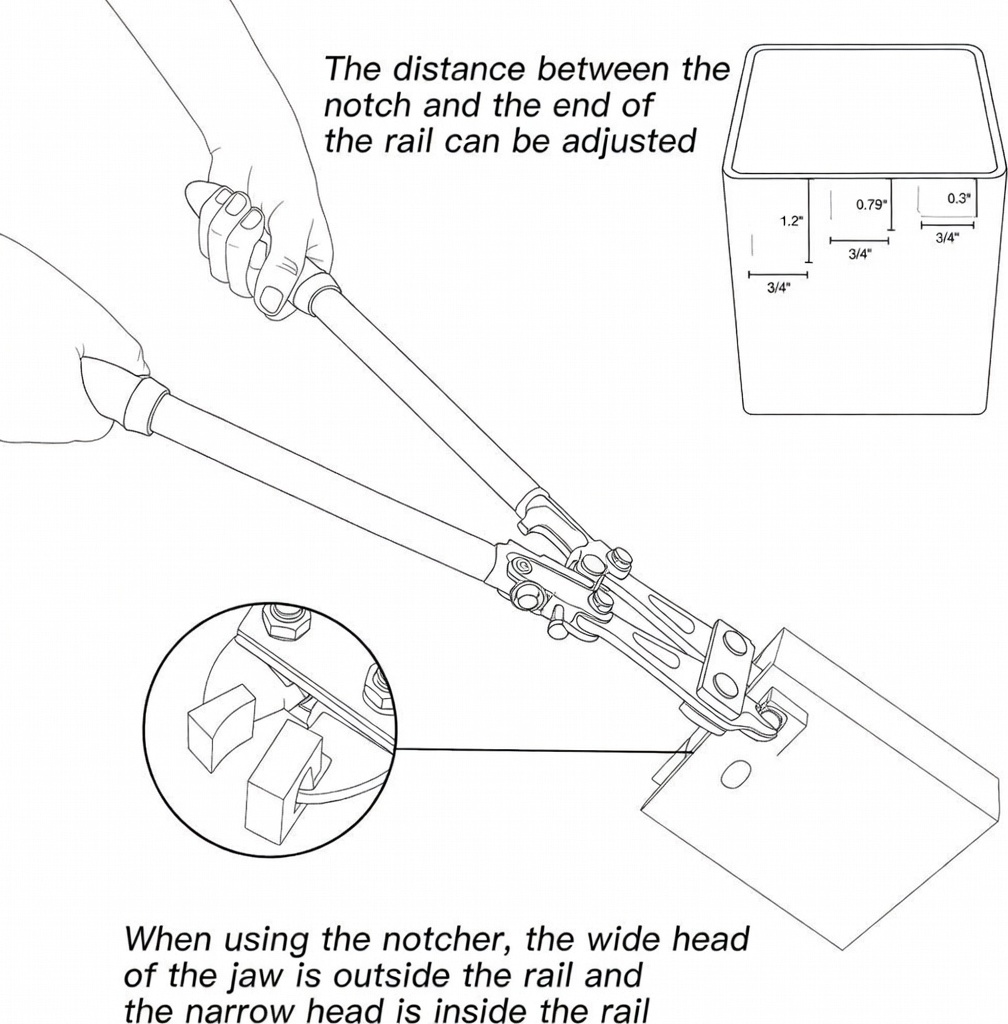
1. Cut and Mark the Rail
Cut the vinyl rail to final length. Mark the tab location so it aligns with the routed slot inside the post.
2. Position the Notcher
Open the jaws and insert the anvil inside the hollow rail. Align the punch on the outside face of the rail where the tab is required. Keep the tool square for a clean crimp.
3. Punch the Tab
Squeeze the handles with steady pressure. The compound action creates a crisp locking tab without cracking the vinyl.
4. Install the Rail
Slide the rail into the post until the tab snaps into place. For removal, depress the tab with a flat screwdriver.
Tip: Test on a scrap rail to confirm alignment before production work.
Common Mistakes to Avoid
- Notching cold vinyl: Cold material cracks more easily—warm rails if working in cooler temps.
- Over-crimping: Excess force can distort thicker rails.
- Wrong system: Some vinyl fences use brackets instead of tabs—verify system type first.
Questions?
800-350-8665 – Sales@toolguy.com

PO Box 4041
Thousand Oaks, CA 91359
Copyright © 2019 ToolGuy.com - All Rights Reserved.